Your first time on Callchimp?
Mar 11, 2024
•5 minute read•1259 views
Welcome to Callchimp! It's so awesome how you've taken the first step to elevate your business to the next step with the power of Generative AI along with automated calls. While we have changed the call center dynamic and left people puzzled about our smooth and fast operations, we also realized understanding our interface might be a tiny bump for someone new to this domain. In this blog, we'll look at step-by-step methods to get started with Callchimp and place your first AI-enabled customer call within 5 minutes!
Step 1: Signup/ Login
Callchimp has a very generous and unlimited free trial program called the "sandbox mode" which lets you explore the full potential of Callchimp at Rs. 0.00.
To get started, sign up at callchimp.ai/signup
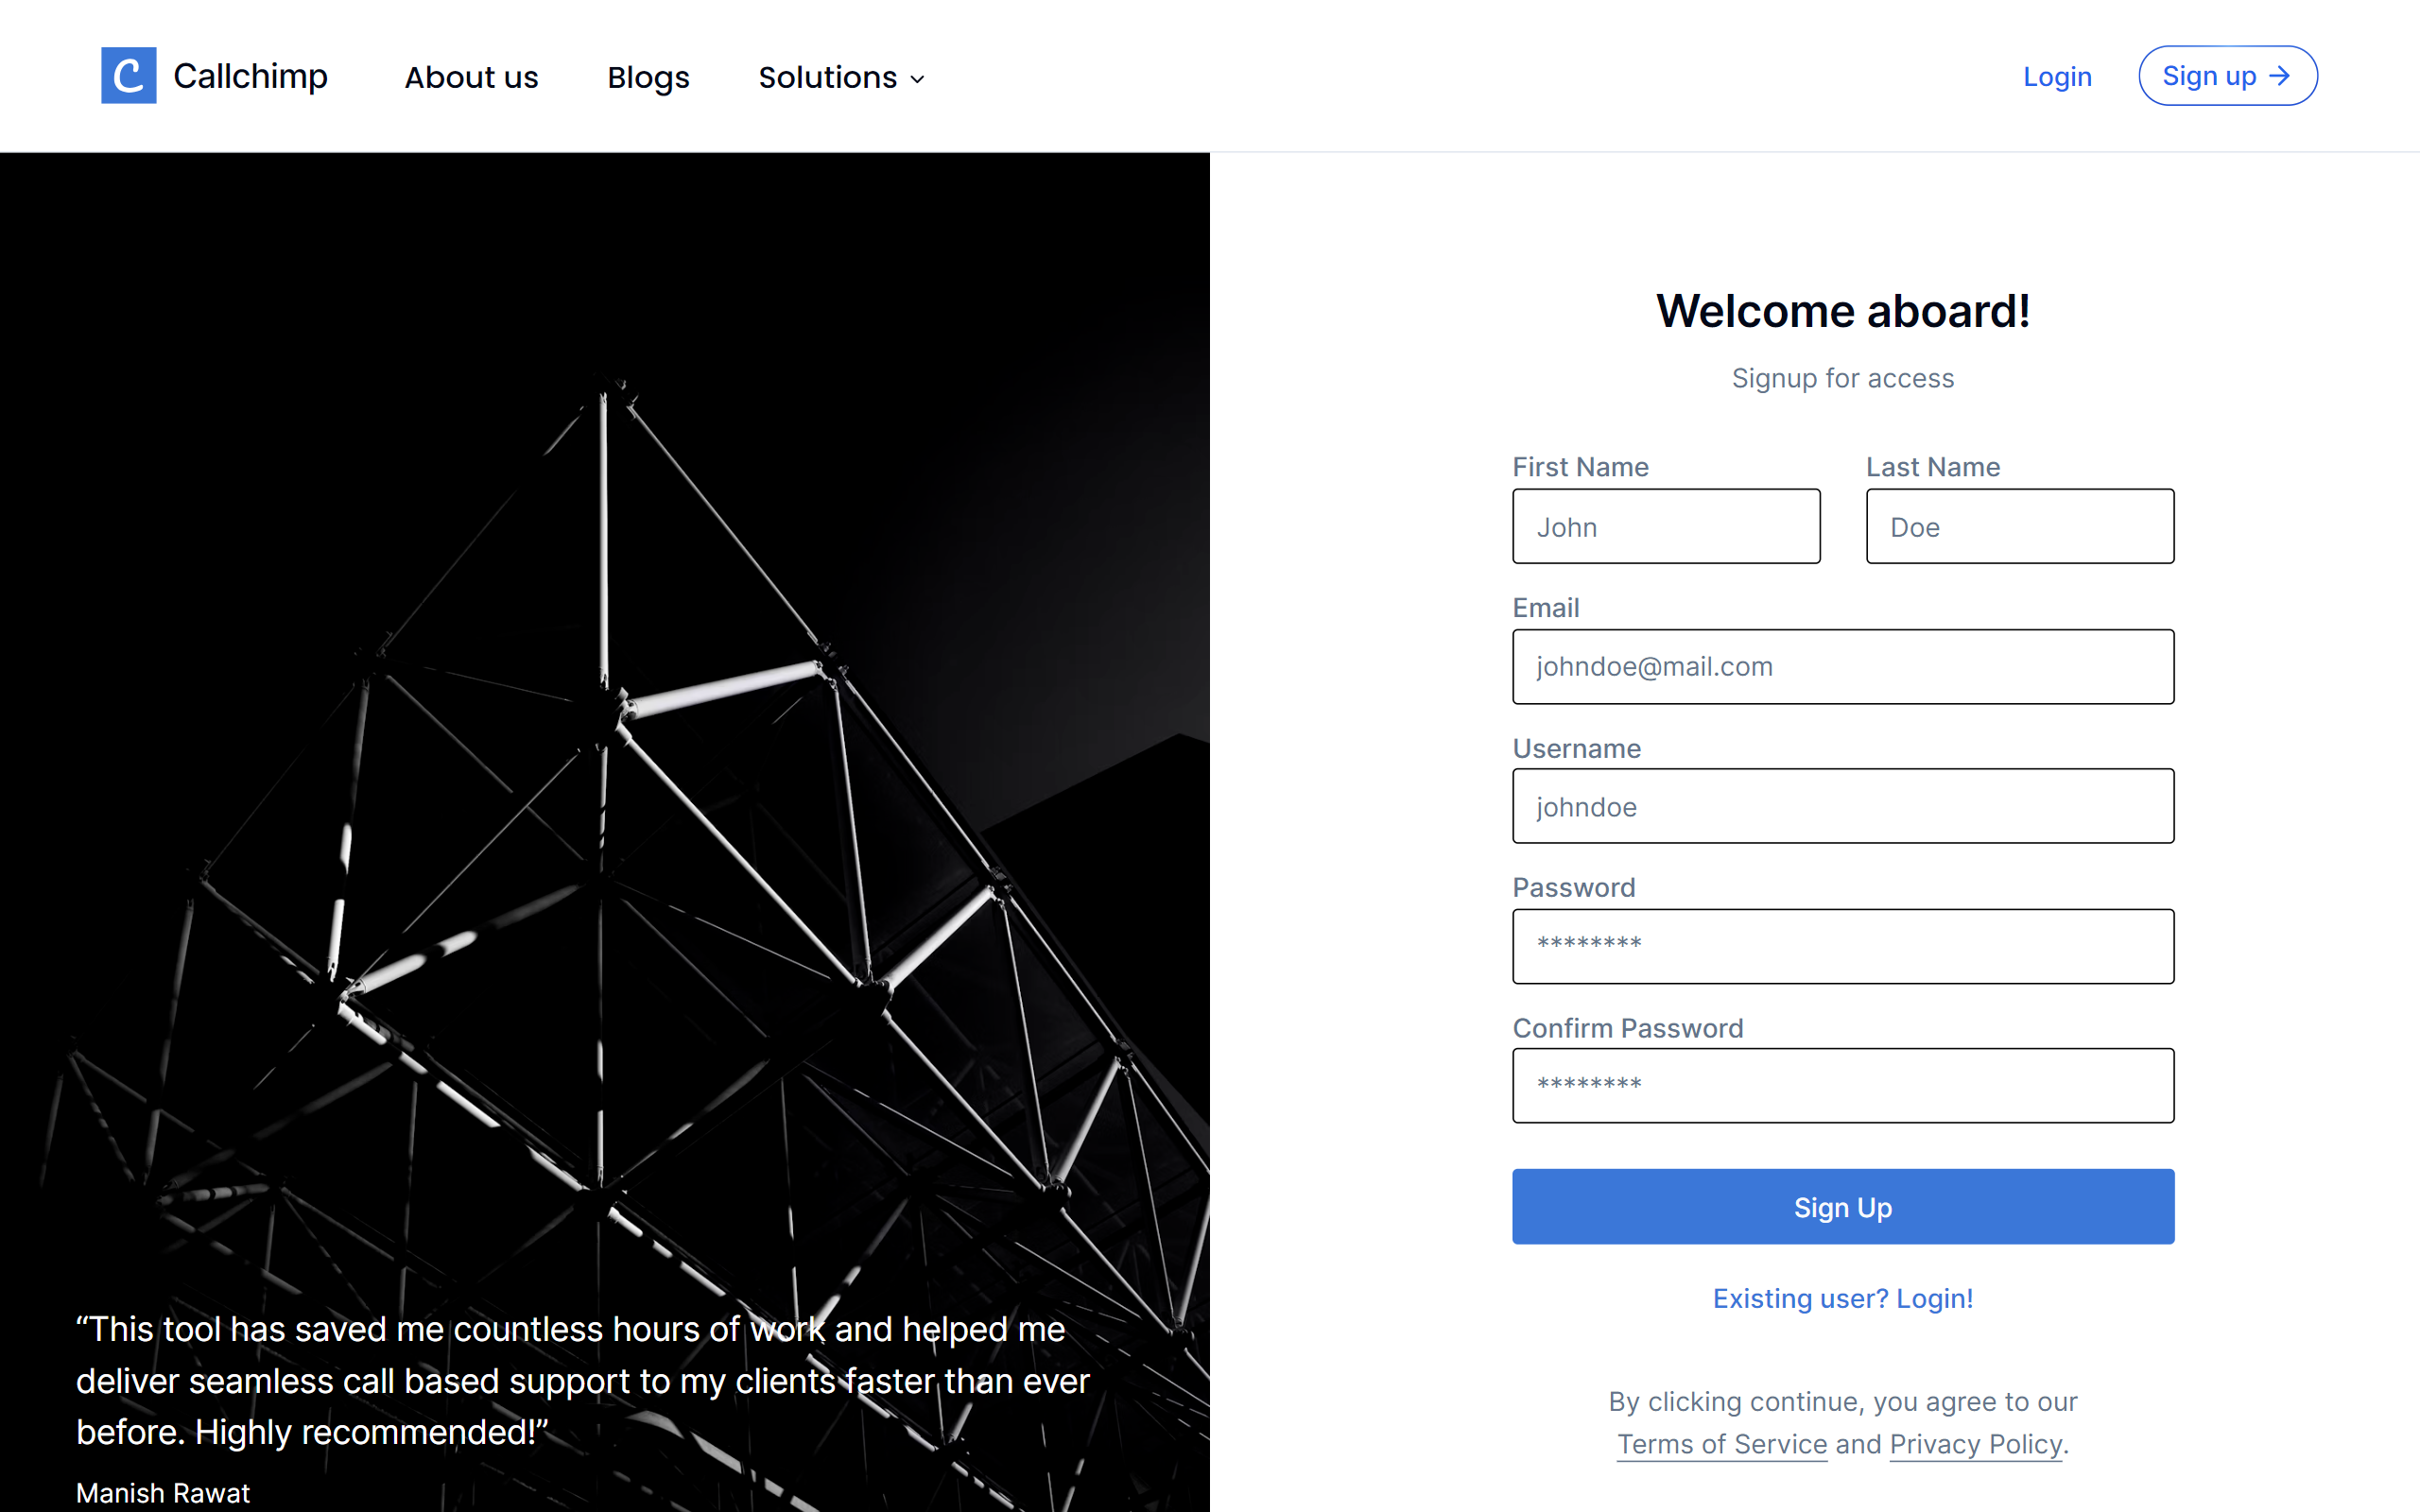
Just ensure the username is unique and easily recollectable.
The best password is a combination of alphanumeric characters and symbols.
After signup, you'll automatically be redirected to callchimp.ai/login where you'll need to log in with your username and password and activate your account with the code sent to your email id.
Step 2: Creating an organization
Once you've verified your account, you'll be first prompted to create an organization
Organizations are one of the building blocks of your AI journey with Callchimp.ai An organization can have multiple accounts as members. Each member can enjoy the full power of Callchimp with the pricing plan purchased against a particular organization.
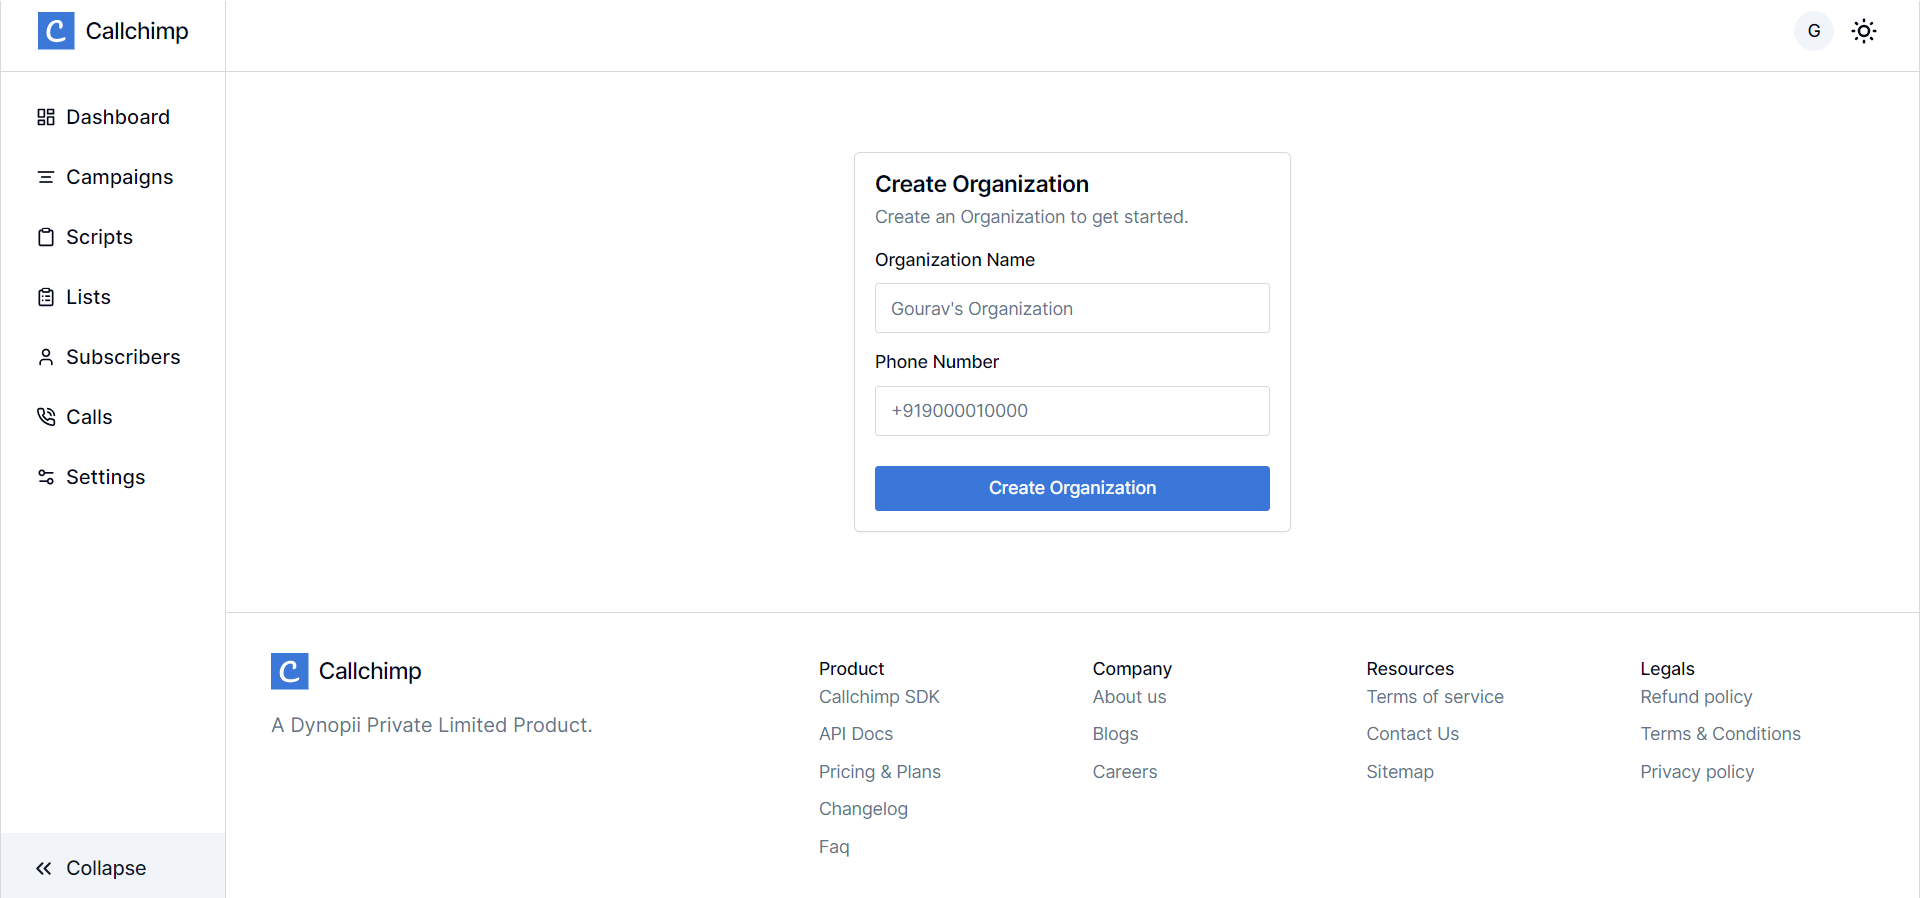
An organization should have a verified phone number associated with it. Each organization comes under a different billing plan. By default, a new organization is put into sandbox mode.
Understanding Sandbox mode:
Sandbox mode is an unlimited free trial program of Callchimp, where you can explore the full power of Callchimp - from creating AI campaigns to using its API keys. The only limitation users will face is, that only numbers that have been OTP verified as supervisors will be eligible to receive calls. Once a plan has been purchased for an organization, all members of that organization move out of the sandbox mode and now can place calls to any number.
Step 3: The Dashboard
After creating an organization, you'll be redirected to the dashboard. The dashboard houses the metrics for all the calls placed. Below is a reference of what a new org user sees.
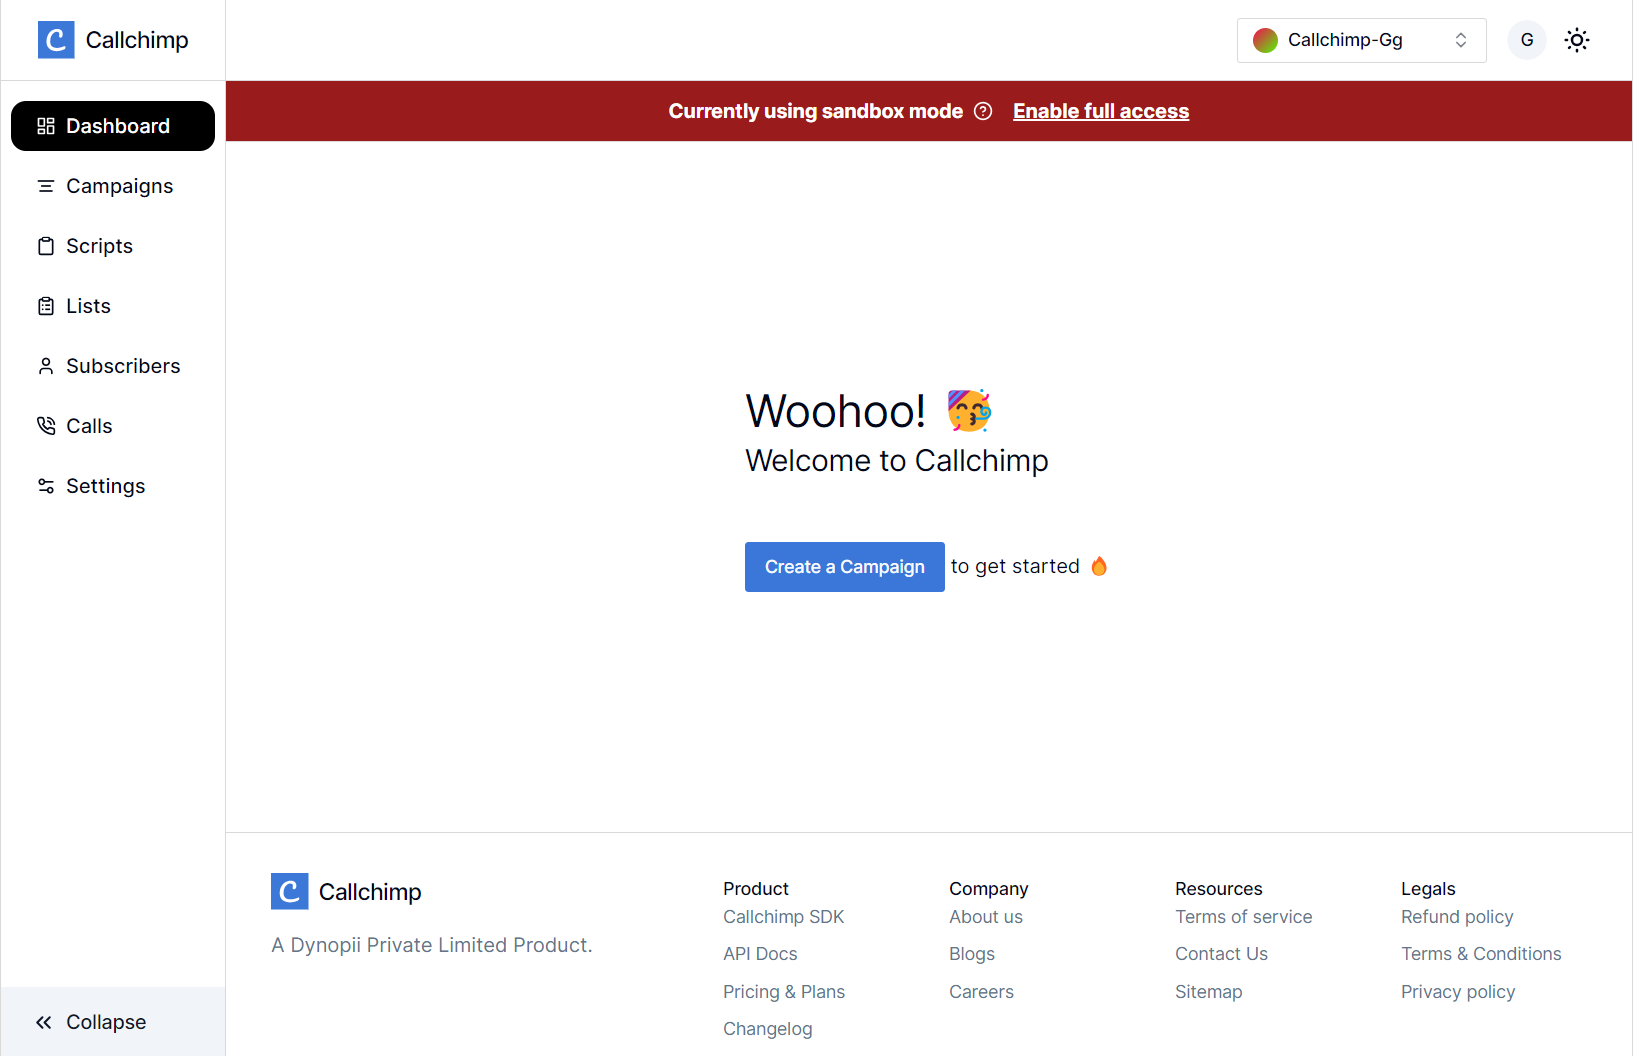
Click on "create a campaign" or navigate to callchimp.ai/campaigns to create a new campaign.
Step 4: Create your first campaign
Campaigns are the crux of placing your AI-generated calls. A campaign provides a wrapper for your entire operation which can connect you with multiple customers using a single template.
Head on to callchimp.ai/campaigns to create a new campaign.
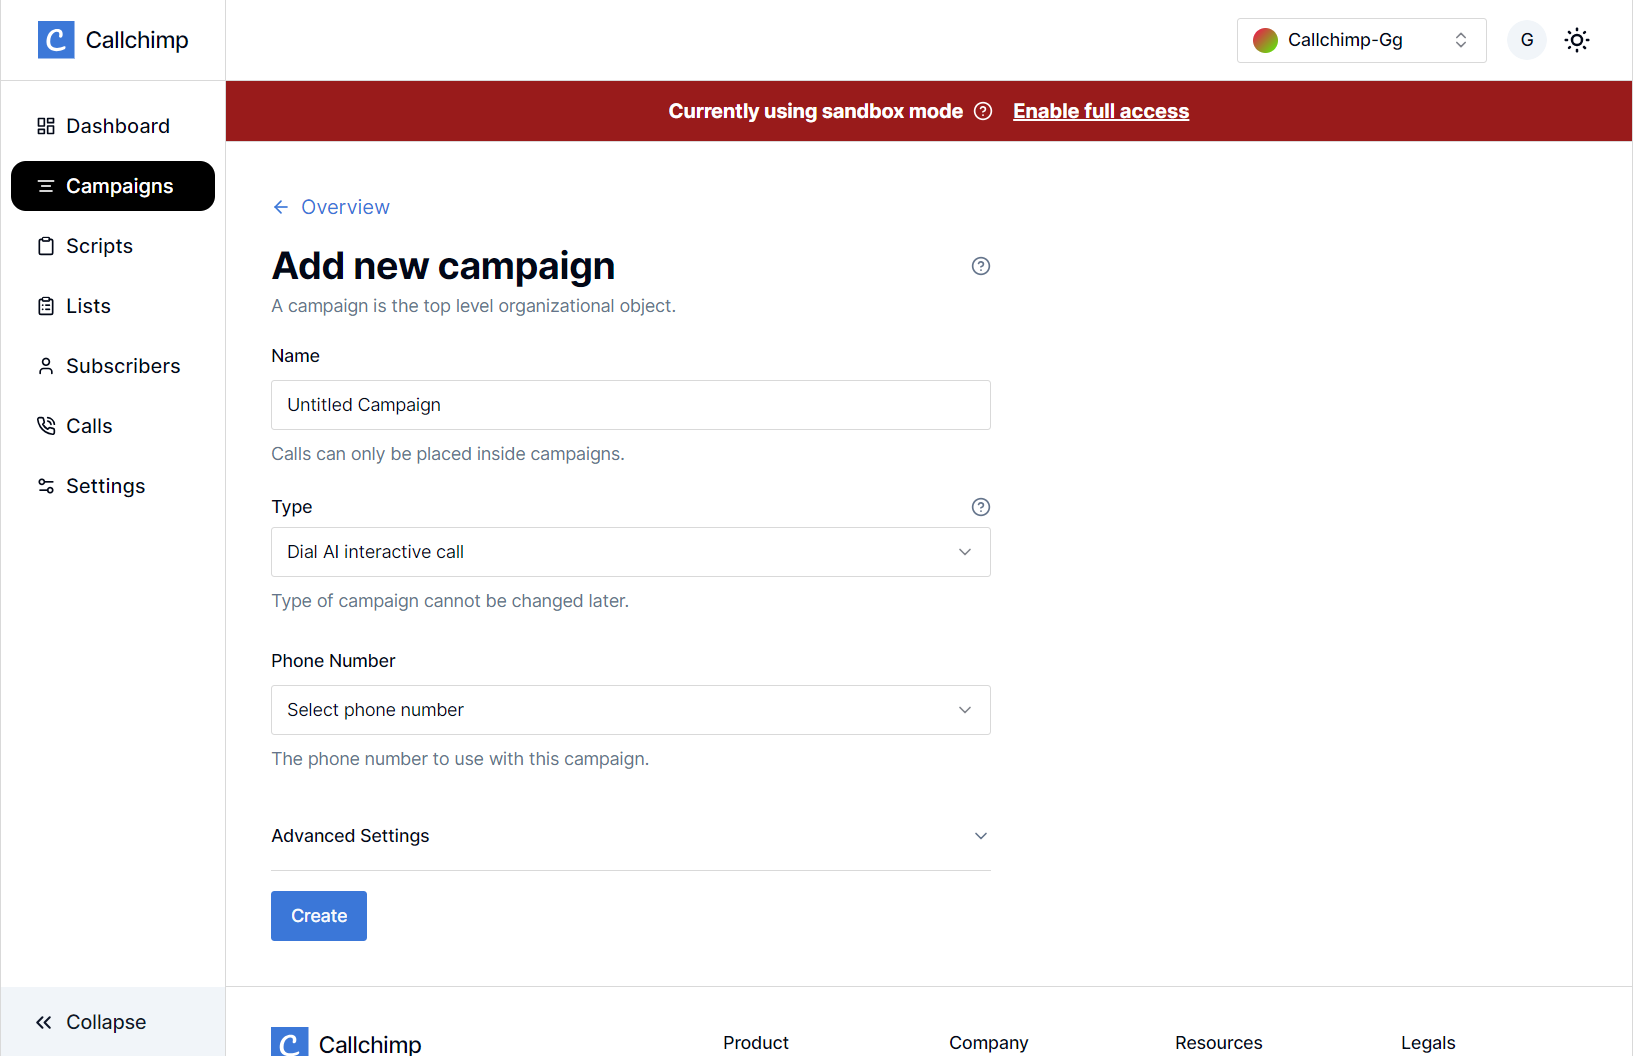
With callchimp.ai, you have access to 4 different types of campaigns:
Outbound AI: Write the script the AI agent will follow while conversing with your customers.
Outbound Bulk: Upload a call recording you want your customers to hear when they pick up your call.
Transactional: These campaigns follow the same script with the only changes being in a few details which are different for each customer.
Inbound AI: This campaign involves AI responding to incoming calls from customers, where the AI is programmed with a variety of responses to address customer queries, concerns, or requests based on the conversation's context, ensuring a personalized and efficient customer service experience.
In the advanced section, you can set the number of retries, and the voices of the AI Agent.
Once you've filled out the details and created a campaign, you'll find a table entry for it and redirected to the campaign details page.
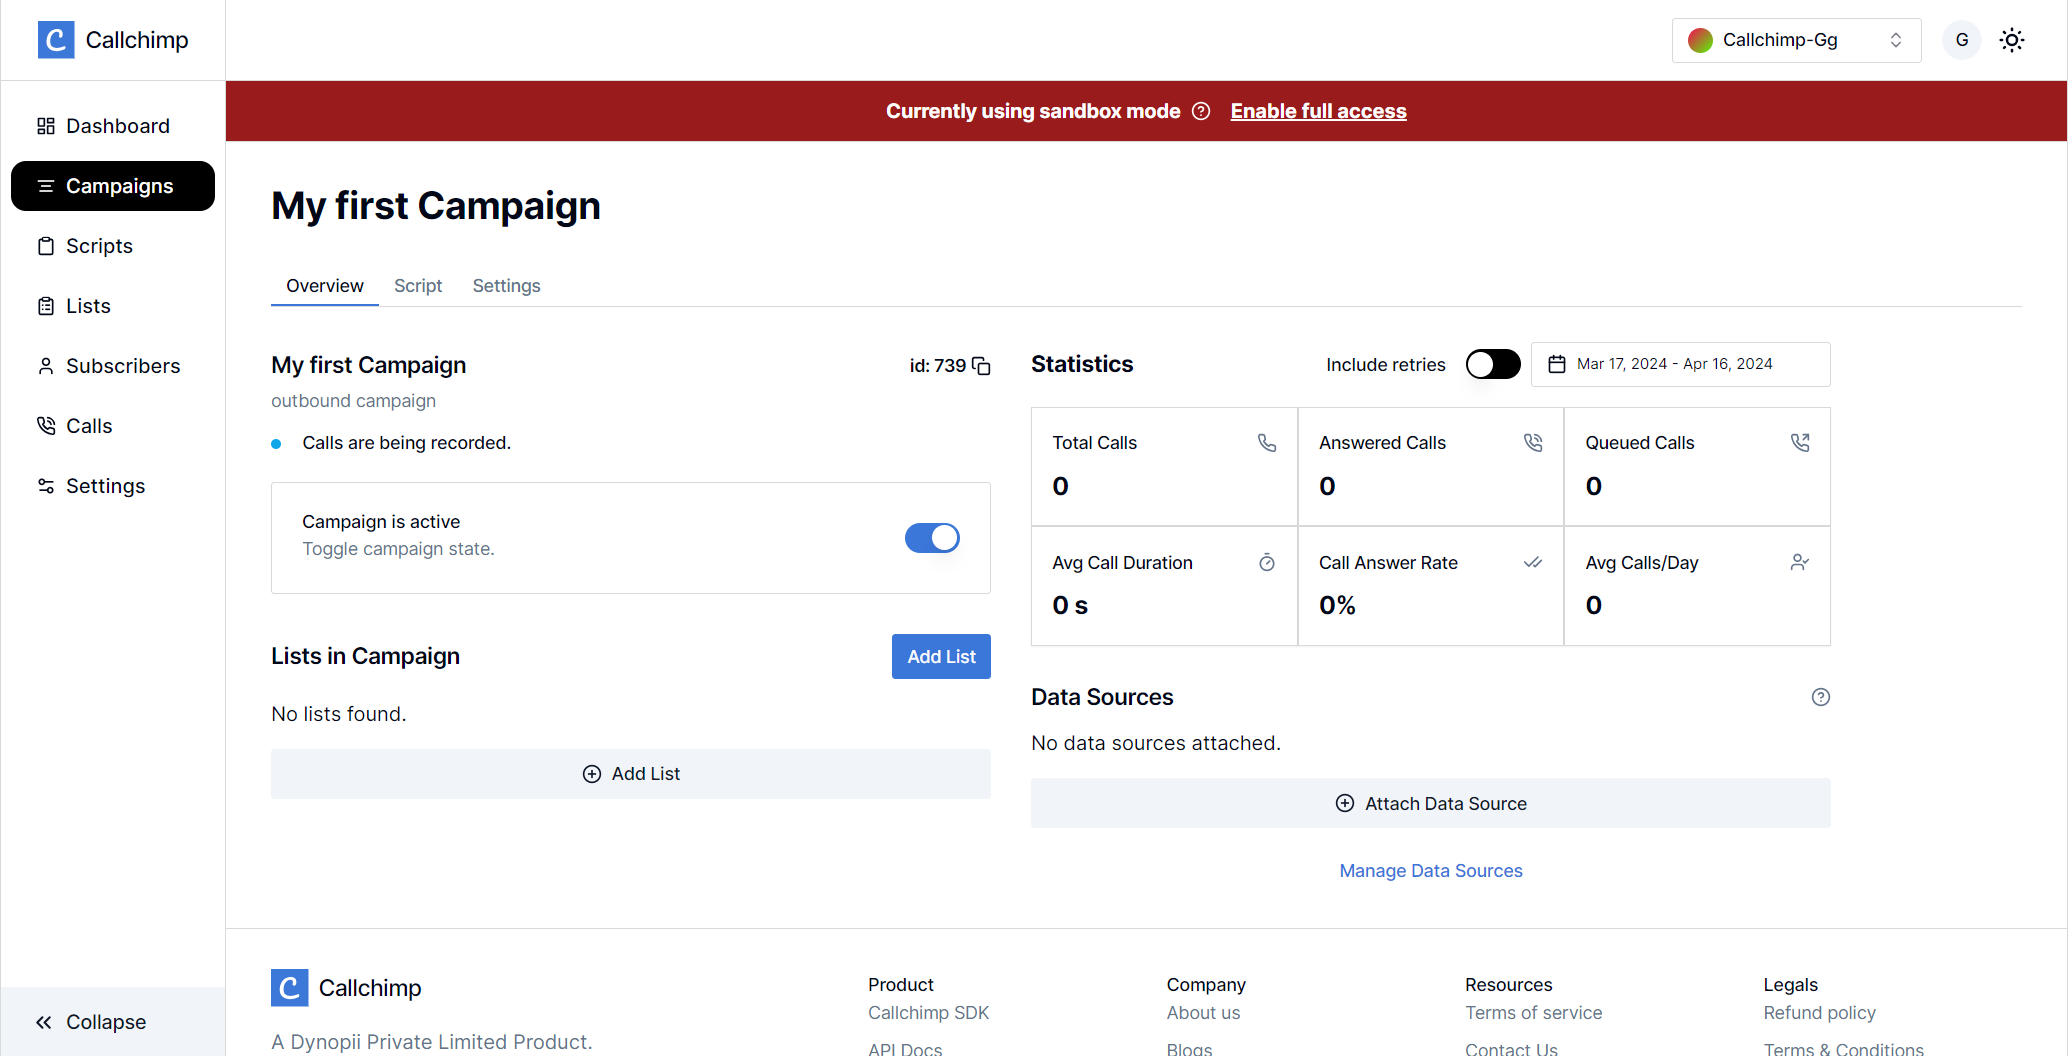
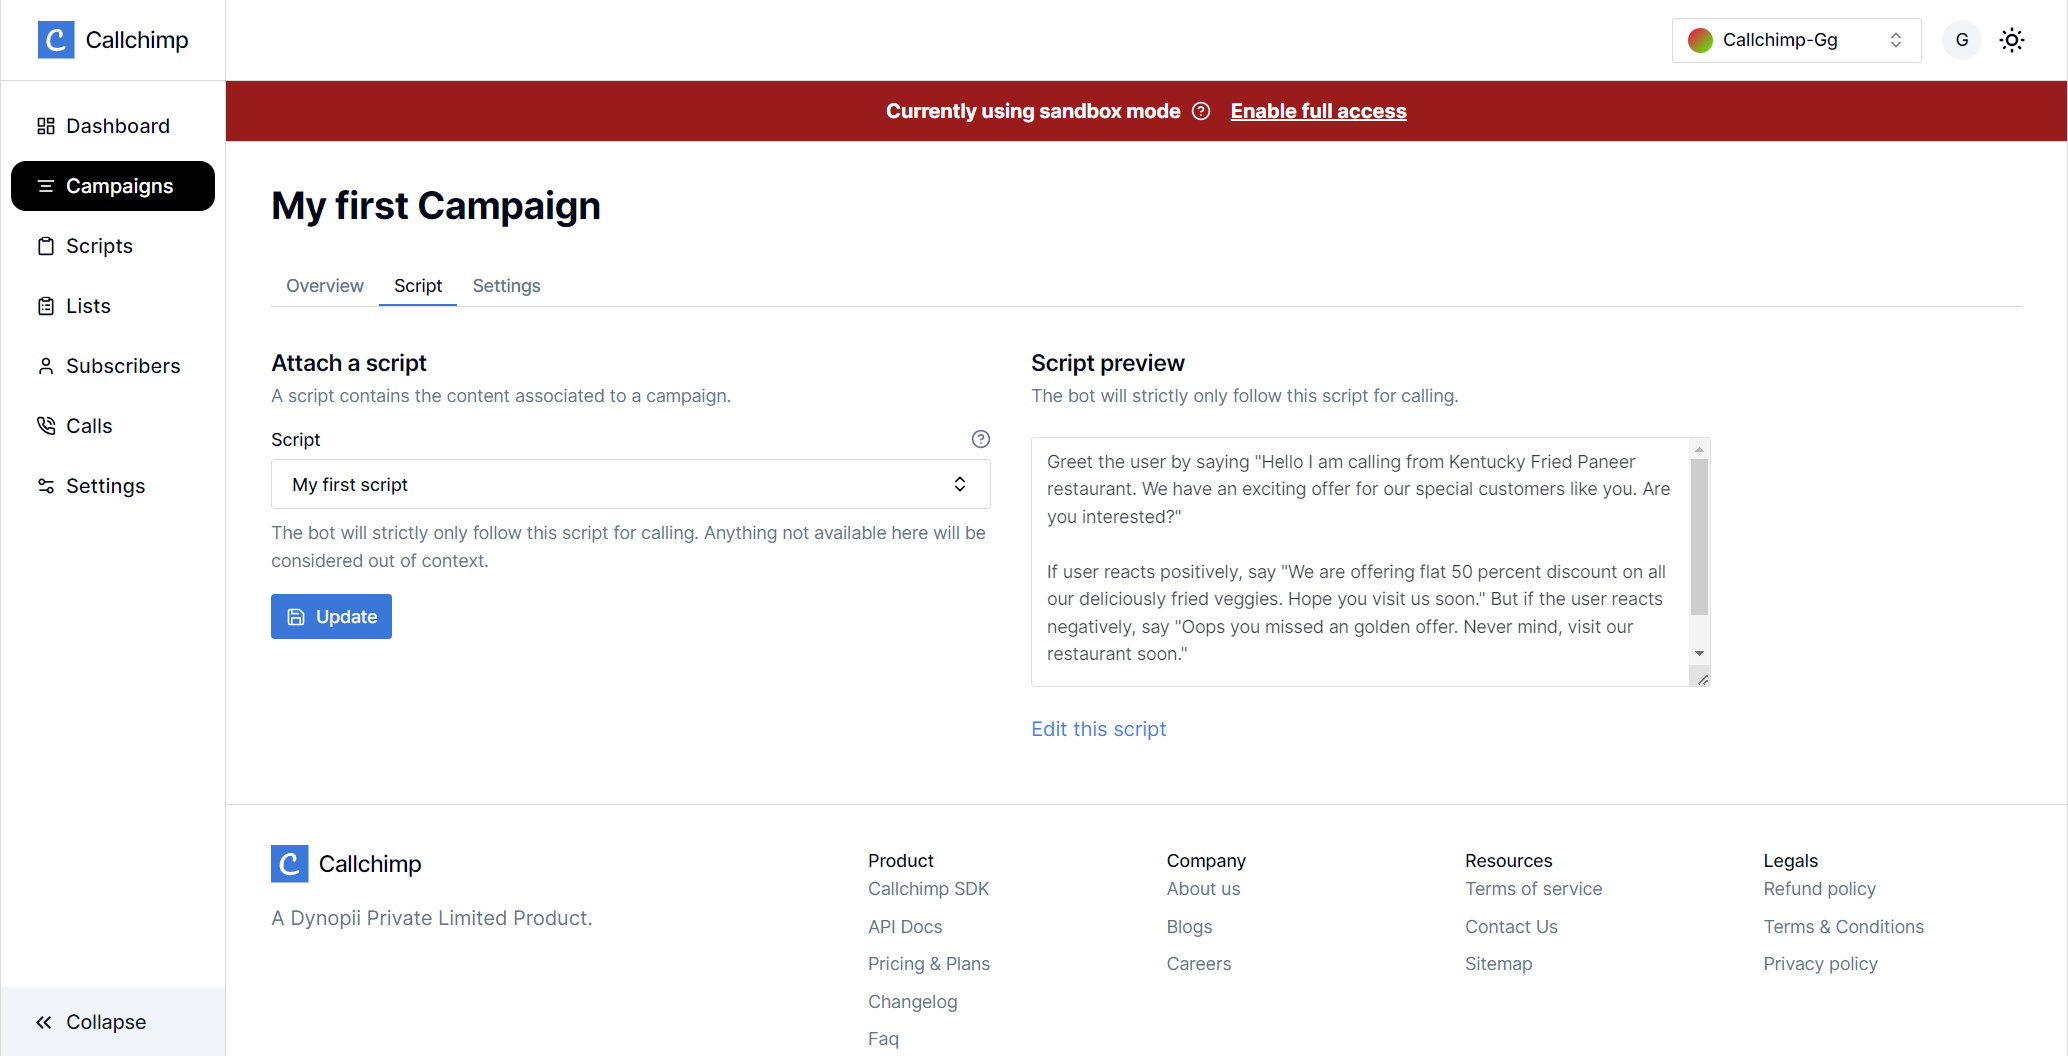
Here you can view the details for the campaigns. Head over to the scripts tab to select your script.
While blastout and transactional calls contain almost static content, Outbound AI calls are dynamic calls whose results depend on the campaign script. You can read our guide for crafting the perfect Callchimp campaign.
Step 5: Create your first script
Scripts dictate what AI agent follows in a campaign. A script is used for Dial AI and transactional-type campaigns. A script is as good as how you write it. You can begin from scratch or choose a template.
Head over to callchimp.ai/scripts/new to create a new script.
Once you've created your first script, it will be available in your campaign to select

Once you visit the scripts tab in your campaign, you'll find the script ready for use.
Once you've written your script or used a template, it'll be time to move on to the next step towards placing your AI calls.
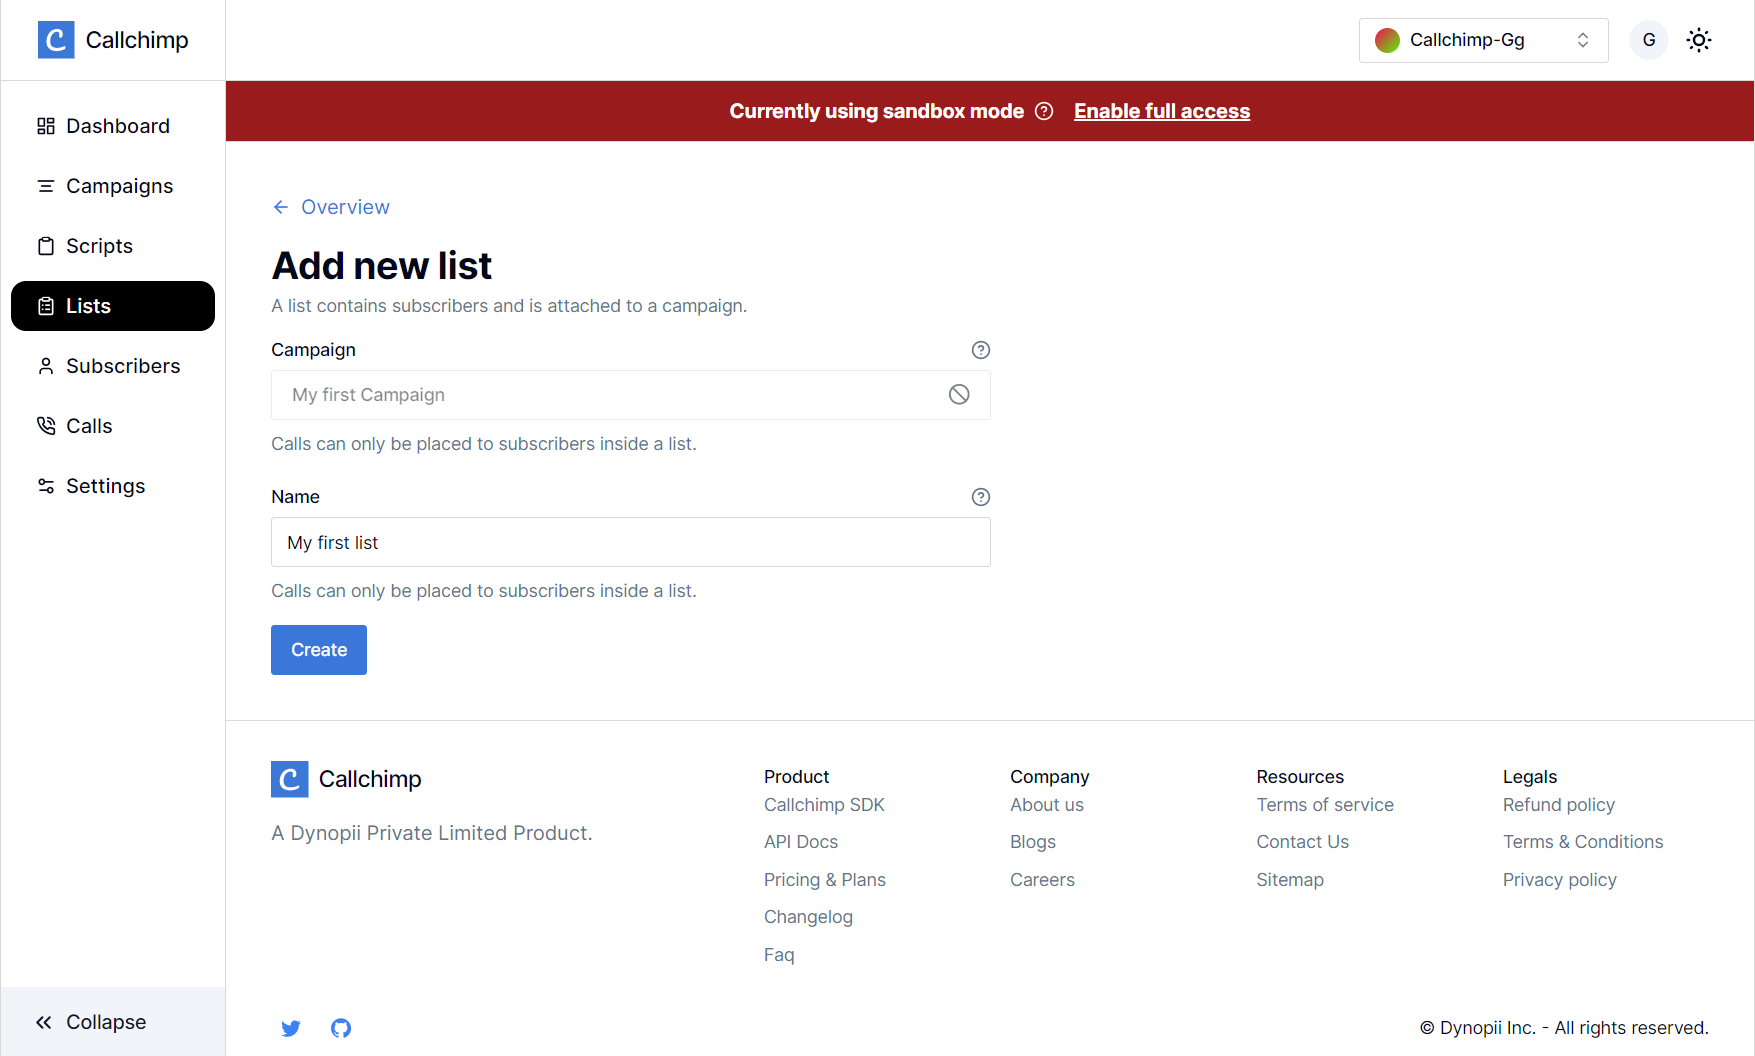
Step 6: Create your first list
Lists provide you the benefit of categorizing your customers under different groups. Let's take an example of an insurance agency using Callchimp. An insurance agent might want to create different groups based on the insurance policy amount. Another example is an institution with list names as cohort or id.
Either use the "Add lists" button on the campaigns page or head over to callchimp.ai/lists to create a new list.
Step 7: Placing your first call
Head over to the list details to which you want to add numbers to. Head over to the "import" tab and upload a CSV file with the details.
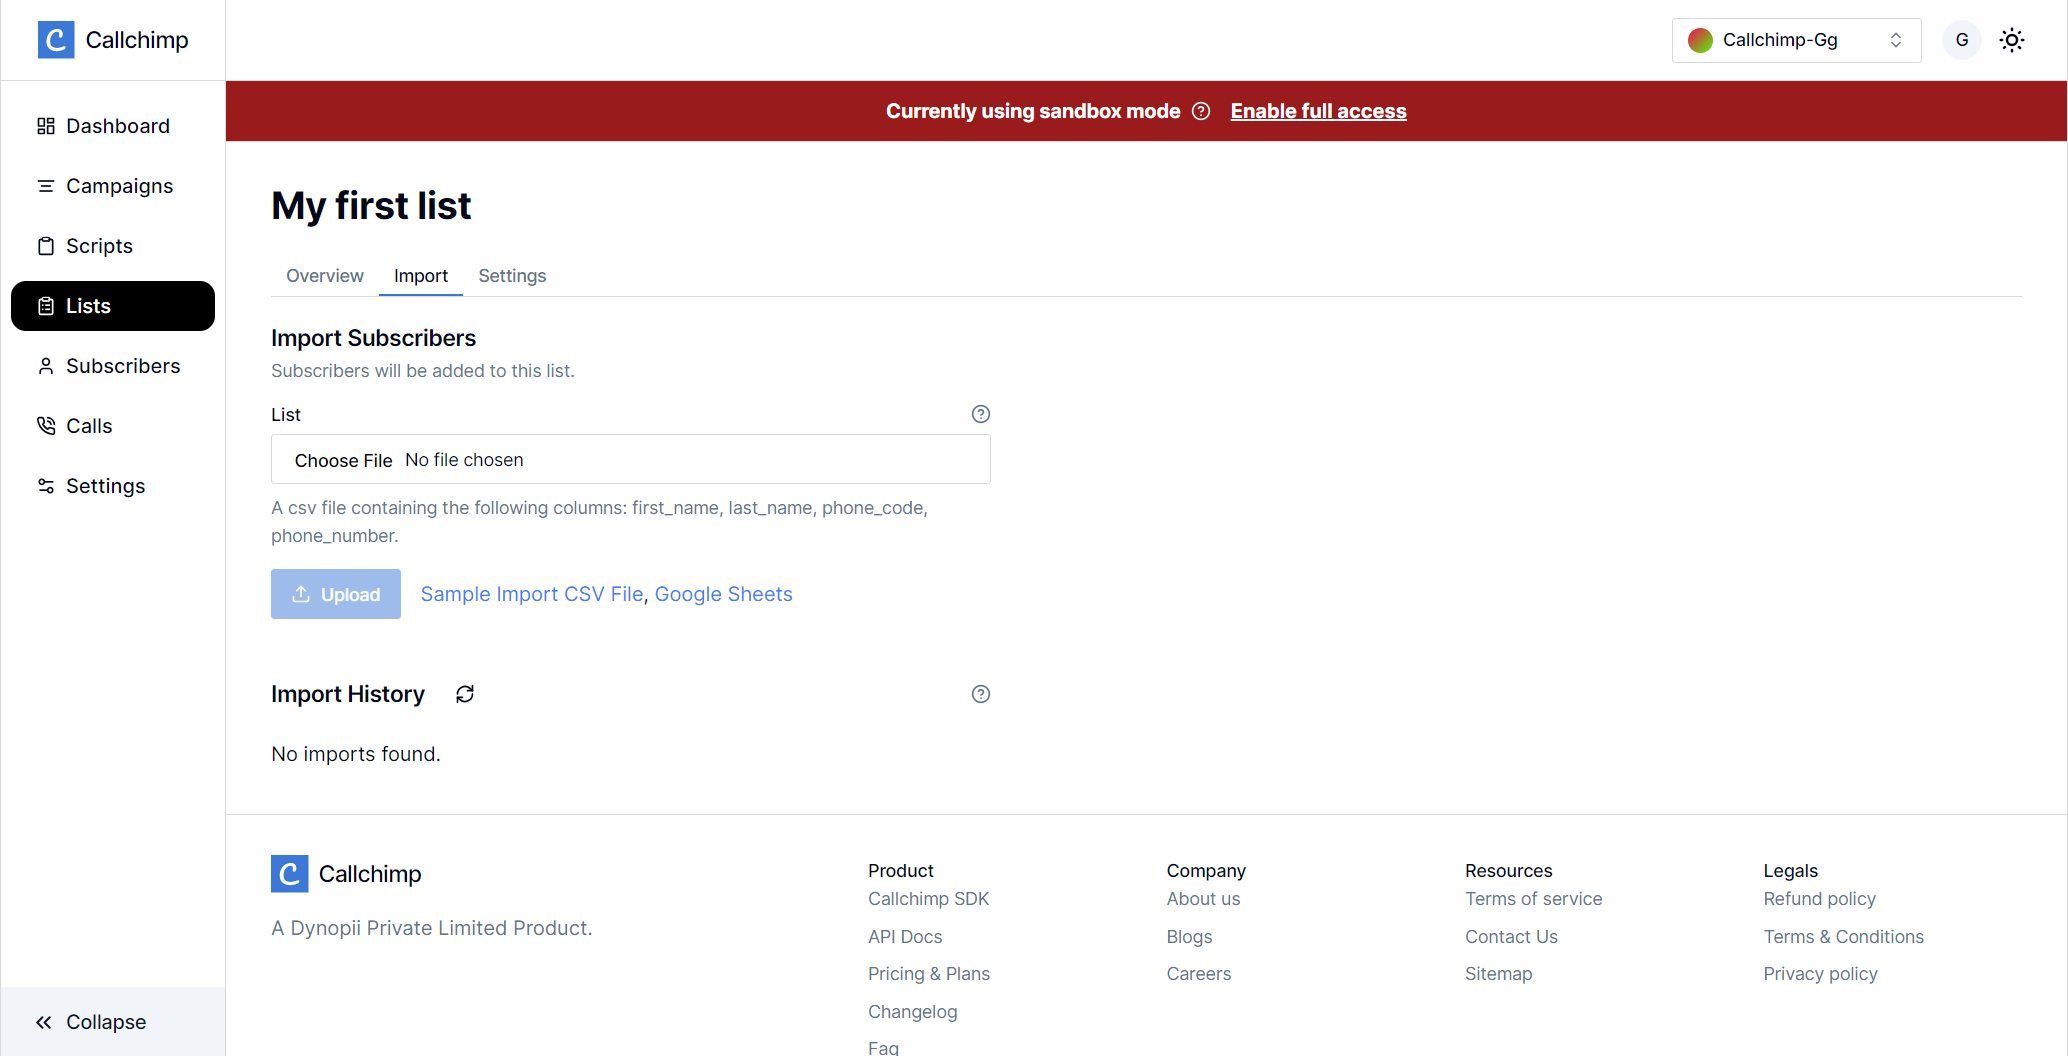
Ensure you upload a correct format CSV to place a call. Any wrong entry can be seen in the import history section. Here's what a correct CSV format looks like:
| first_name | last_name | phone_code | phone_number |
| John | Doe | 91 | 8777****23 |
| Jane | Doe | 91 | 9472****23 |
And all set!
Congratulations on successfully placing your first call! You can view the call status, disposition, recording, etc. at callchimp.ai/calls.
We encourage you to explore more about Callchimp and reach out to us at [email protected] in case of any queries.
TLDR;
Visit callchimp.ai/signup to create an account.
Log in with your username and password to get access to the dashboard.
Select "create a campaign" to get started.
Fill out the details and click on create.
Create a new script and attach it to the associated campaign.
Create a list.
Upload your contact details CSV file to the list.
Enjoy placing your calls and skyrocketing your business.

Learn more about Gourav Ghosal
Passionate about crafting exceptional web experiences that merge creativity with functionality. Skilled in web design, development, UI/UX, graphic design, and small-scale video editing. Committed to creating user-centric designs and adhering to best practices, with a focus on sustainability and innovation.